Pages

Monday, December 26, 2011

Cedar Street Cowl *Free Pattern*

In the spirit of the season, here is an easy peasy cowl for all occasions. I'll have some action shots up this week.

Cedar Street Cowl

Yarn: 3 skeins Knit Picks Full Circle Special Reserve in Bulky. Color: Cardinal (330 yards)
Needles: US 10.5 - 24" circulars
Other: Tapestry Needle

Gauge is not important for this pattern. For reference, gauge for this cowl was about 3.25 spi.  

CO 200
Work in 2x2 rib until piece measures 10" from CO.
BO knitwise

Wear. No blocking required.

If you want it longer, CO more. Smaller? CO less. Wider, knit more rows. Narrower? Knit less.

Enjoy!


Yarn available at Knit Picks for a limited time. 


Saturday, November 26, 2011

Stationery card

Berry Merry Frame Holiday Card
Create custom Christmas cards this holiday at Shutterfly.
View the entire collection of cards.

Tuesday, September 27, 2011

ellowyn and evrim

my two newest patterns are soon to be released.

ellown and evrim are my first bottom up sweaters, cabled bodies, long sleeves and hooded.

they turned out better then I could have imagined and I can't not wait for them to be released.

I'm hoping to have them in the hands of the tech editor in the next day or so. they are formatted and ready to go. depending on her time line, i'm hoping they will be out no later then October 10, 2011.

Ellowyn can be found here:
http://www.ravelry.com/patterns/library/ellowyn

and evrim....

They will be available separately as well as in an eBook.

Sunday, September 11, 2011

Itty Bitty Contest to Benefit the Fundraiser...Oh, Yeah, there is a fundrasier

As some of you know (those who follow us on Facebook or Ravelry), I am hosting a fundraiser to help fund my inner city classroom. Every year, I submit a grant to DonorsChoose to help fill gaps in resources. This year, I wished big and have been unable to get donations. I asked some friends to help and we are hosting auctions on Knit Night to help make this happen. The auctions start on September 29 at noon. I hope you will consider bidding or donating directly.


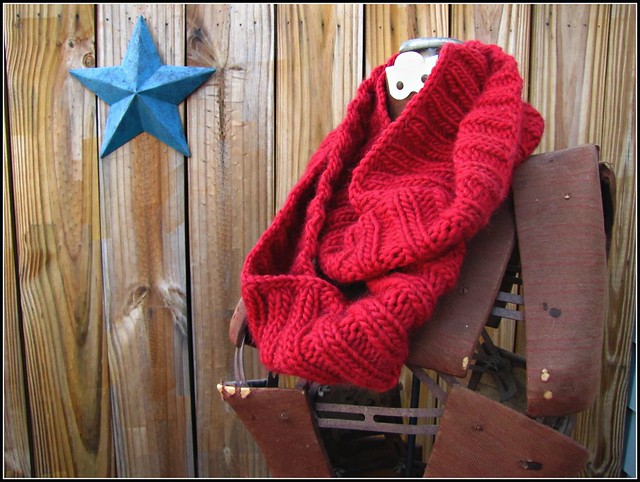
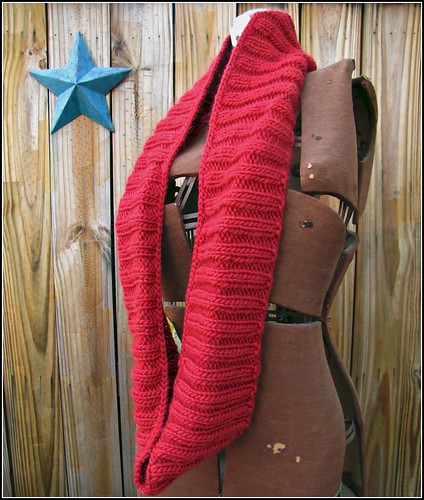
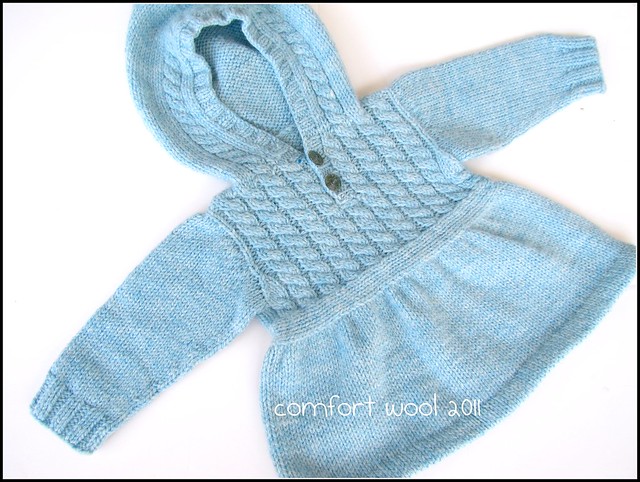
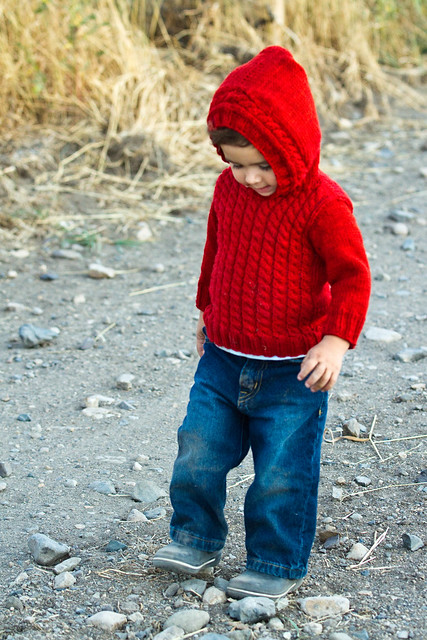
So, to continue garnering interest in the auctions, I am going to hold a contest. The prize isn't much. We are after all, trying to raise money. The winner will receive a Comfort Wool Pattern Bundle. It will include only the two soon to be released, Ellowyn and Evrim patterns.

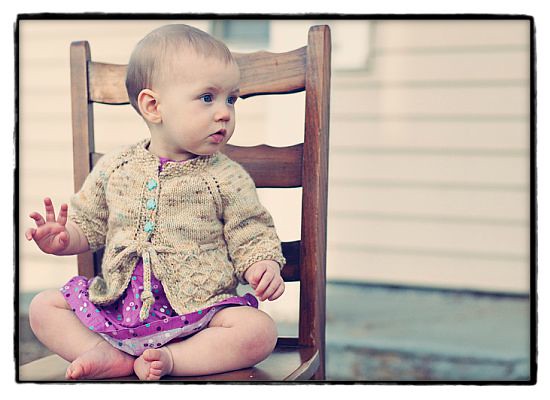
 {photo courtesy of kate bentley photography}

So, how do you enter?

1. Post on your Facebook wall about the fundraisers and include a link to Knit Night. You can enter this way daily by posting a comment here letting me know you shared on your wall.
2. Post information on your blog with links to my blog and Knit Night. Post the link to your blog in the comments here. (One Entry)
3. Include information in your signature on public boards, such as DiaperSwappers. Link me to your profile. (One Entry)
4. Pin our auctions on Pininterest. (One Entry).
5. Post about the two new patterns on your facebook, pintinterst, etc. One entry each.
5. Have another creative way to share our fundraiser? Let me know.

A winner will be chosen by random on September 29 from the comments on this blog. So be sure to tell me in the comments how you helped spread the word. Make one comment for each entry!

Thanks for helping to spread the word!!!!!!

Sunday, September 4, 2011

Tutorial : Sewn Hemmed Edge for Knitwear {Top Down}

This is a hemmed edge tutorial for when the garment is knit top down and you need to hem the bound off edge.


I use a contrasting color yarn, but you should use the yarn that is attached to your garment, in the same color. I suggest leaving a tail approx. 3 times the circumference of your garment hem. So, if the bottom of your hat is 21" around, I would leave a 63" tail.

At this point, you should have bound off the edge you want to hem. Note that some people prefer to wash, block and pin their edge before hemming. I have found it totally unnecessary and it doesn't effect the finish garment look. If you feel more comfortable doing this, by all means. If you trust yourself to know which row you are working on without it, then don't bother.
Step 1
Let's skip straight to Step 2, since all step one involved was finding your bound off edge. Turn your work inside out. Fold over the appropriate amount as directed by your pattern. You can use an iron and steam it down so that you are sure it is even. Or you can eye ball. Easy enough, to be honest. I eye balled it for my garment and it was perfect.
Step 2
Step 3: You will use the long tail you left after binding off. Go up through the first "u" shaped purl bump. It should be directly above the first bound off stitch.
Step 3
Step 4:Go back down through the next "u" shaped bump and down through the next bound of stitch. Just like in weaving in, but you are attaching to the bound off edge.
Step 4

Step 5: Headed back up through the bound off and up through a "U" shaped bump.
Step 5

Step 6: Same as Step 4 :)
Step 6

Continue this way around or across the row. When you get to the end, the inside should look like this:
Last Picture
Continue weaving in your ends! The right side of your garment will look like it does on my Ellowyn design.Final Ellowyn


Anything unclear? Please feel free to ask in the comments or shoot me an email.

that time of year where i have to start begging

Is there any better way to learn than by interacting with the material you're being taught? I'm a 6th and 7th grade teacher of Language Arts and US History. We are a high-poverty school serving at-risk youth. My children come to school ready to learn, but are often set up for failure from day one. Without their basic school supply needs being met, they can't truly excel in their studies.

If you feel compelled to help, any small donation is appreciated. There are two ways you can help fund my classroom

Through "Adopt a Classroom" or DonorsChoose.


http://www.adoptaclassroom.org/

Thank you!

Saturday, July 30, 2011

summer is about half done for me

In summer, the song sings itself.  ~William Carlos Williams


Williams is by far, one of my favorite modernist poets. And so often, he has just the right words, for just the right moment. It is no surprise that he can then sum up this season for me.


The air is warm, clothes are few, feet are bare. We spend endless hours outside, inhaling it all, and you need not force the beauty of the day. It just....is. Yet, it has been a loooooooong  time since I was a child, and this song of summer seems a song of youth. During the endless hot days of adulthood summers, one finds ways to both entertain the children and entertain oneself. While they are engrossed in the beauty and heat of it all, I sit sweating with a bottle of water and some knitting (probably why I'm sweating....). Yet, I do love it. And kind of hate, but try to remember why I loved it.

As I get older, I begin to appreciate more, the art of handmade, the beauty of home, the process of creation, and the joy in doing. So, instead of spending another idle summer at the park, letting the children play, I've decided to create for me (and if the rest of the family finds happiness in my creations, so be it.)


So, remember the ugly old weeded front yard? Remember seeing my sweaty chest? The hottest day of the year. (I'm a genius. Really.)

Well, that hard work paid off. One blister, one knife cut and one busted cuticle later...


IMG_0949

My front yard is done!!!!!! I love it! We love it. It is so purty.

IMG_0936


I also found a local restaurant that had thrown this beauty in the trash. I put it on my covered side porch and Voila! A garden cart!

free rack

I finally got the curtains done. (Okay...I got two out of three done. It is kind of like second sock syndrome. You knitters know what i mean. I see the fabric. It is measured out. Ready to iron and sew and BAM! No motivation to finish. The kids may or may not have given up hope. I stopped asking.)

Curtain One

I've also started getting my feet wet dyeing again, despite my haitus.
Birch Blossom

Birch Blossom

And lastly...I've got a hoodie pattern in the works. But shhh...this is top secret. You can't tell anyone....
IMG_1007

Wednesday, July 13, 2011

i'm on a craft spree (call the police!)

I saw this wall on pinterest....


and as much art as my kids bring home and do at home, and the children's museum, i thought this would be PERFECT for them.

So I did it today. The paint was $15 (didn't even use half a can...), the molding was $5, the caulk adhesive was $4.A total of $25!!!!

I already had the shelves (these will be for their 3-D art).

I made two mistakes. The lettering is on a small slant. You can't tell looking dead on and standing but it is so obvious from this angle. Also, I measured the wall at the base board to make sure I was straight. The problem with this was that the place I was actually placing the molding ended up being 5/8" bigger. So, two mistakes, but made with love.

can you believe I don't have a single wall in the kids space that doesn't have an outlet?? Tomorrow I am going to buy a black outlet cover and the part that you actually plus in (whatever that is called) so it blends in.

the quote is picasso...
IMG_0925


IMG_0927

IMG_0921

Then using the same block art from the kitchen, i made these. the middle is paint chip art. i hole punched all those holes and hand glued them individually then did a sealer coat with Modge Podge. The middle background is actually brown, but was hard to capture because the light was coming in the window

IMG_0913

before i sealed it.
IMG_0911

Tuesday, July 12, 2011

the summer that never sleeps

we are keeping VERY busy in this house this summer.

I've been learning/teaching myself to sew and made some cute little pillows using the tutorial on Design*Sponge


My First Sewing Project

Then I made a little garland from paint chips that I found on pinterest. Directions can be found on a blog called "Grace and Light Studio"

IMG_0875

Then I made some art blocks for my dining room out of scrapbook paper and shelving wood. Directions on "Becoming Martha"

hung up

Lasty, we've been redoing the front yard. It has lived the past five years as a pain in our arse and the bane of my existence. I hate grass. HATE IT. Strong words, I know, but you can't even begin to understand how much I hated coming home and being greeted by this yard. This summer, I decided this would be our outside project. (You may remember that last year we built raised bed gardens in our back yard. They make it look so much nicer.)

Here is said bane...
Before

Before

Step one was too pull all that nasty up. We did it with two garden claws and alot of water. Did I mention the high today was 103???

step 2...

I was literally dripping sweat. This was a better work out then the running I've been doing lately.
literally dripping.

Just as we finished this part, a neighbor comes over and says he has a tiller we can borrow. Nice. Perfect "Alanis Morissett timing" Really. But we need to go over it again, because, as you can see, it wasn't the most effective way to pull up weeds.

needs a second over

And here is about half of what we bought to plant. We still need to get ground cover once we get the big plants in.
some of the flowers

More pictures to come as the yarn progresses from ratty weed grass to flowering garden. Stay tuned. ♥


Saturday, July 2, 2011

Family o' Puppets

I'm hoping by now, you've read my entry on the puppet show from yesterday. Well, as promised, we made puppets of ourselves and then put together a silly little puppet show afterwards.

The kids had a ton of fun creating paper bag versions of themselves. Elliot insisted her entire doll be purple. Caden couldn't leave off his "beautiful curls."

I couldn't help but to make one of my husband who was in charge of keeping the baby away from the pointy scissors (a job at which he horribly failed...)

Without further ado...our family, brown paper bag style.